06. Robot Pose EKF Package
Robot Pose EKF Package
EKF package:
Access this link and go through the robot_pose_ekf documentation.
Install the package:
$ cd /home/workspace/catkin_ws/src/
$ git clone https://github.com/udacity/robot_pose_ekf
Quiz:
robot_pose_ekf
Task Description:
Follow the steps and launch the
robot_pose_ekf
node:
Task Feedback:
Great Job!
Quiz Solution:
Here are the steps to edit and launch the
ros_pose_ekf
launch file:
First, edit
robot_pose_ekf.launch
file:
<launch>

<node pkg="robot_pose_ekf" type="robot_pose_ekf" name="robot_pose_ekf">
  <param name="output_frame" value="odom_combined"/>
  <param name="base_footprint_frame" value="base_footprint"/>
  <param name="freq" value="30.0"/>
  <param name="sensor_timeout" value="1.0"/>
  <param name="odom_used" value="true"/>
  <param name="imu_used" value="true"/>
  <param name="vo_used" value="false"/>

  <remap from="imu_data" to="/mobile_base/sensors/imu_data" />

</node>

</launch>
Now, build the package:
$ cd /home/workspace/catkin_ws
$ catkin_make
$ source devel/setup.bash
Launch the node:
$ roslaunch robot_pose_ekf robot_pose_ekf.launch
Now, topics from the
robot
and
ekf
nodes should be communicating. To confirm that, run the
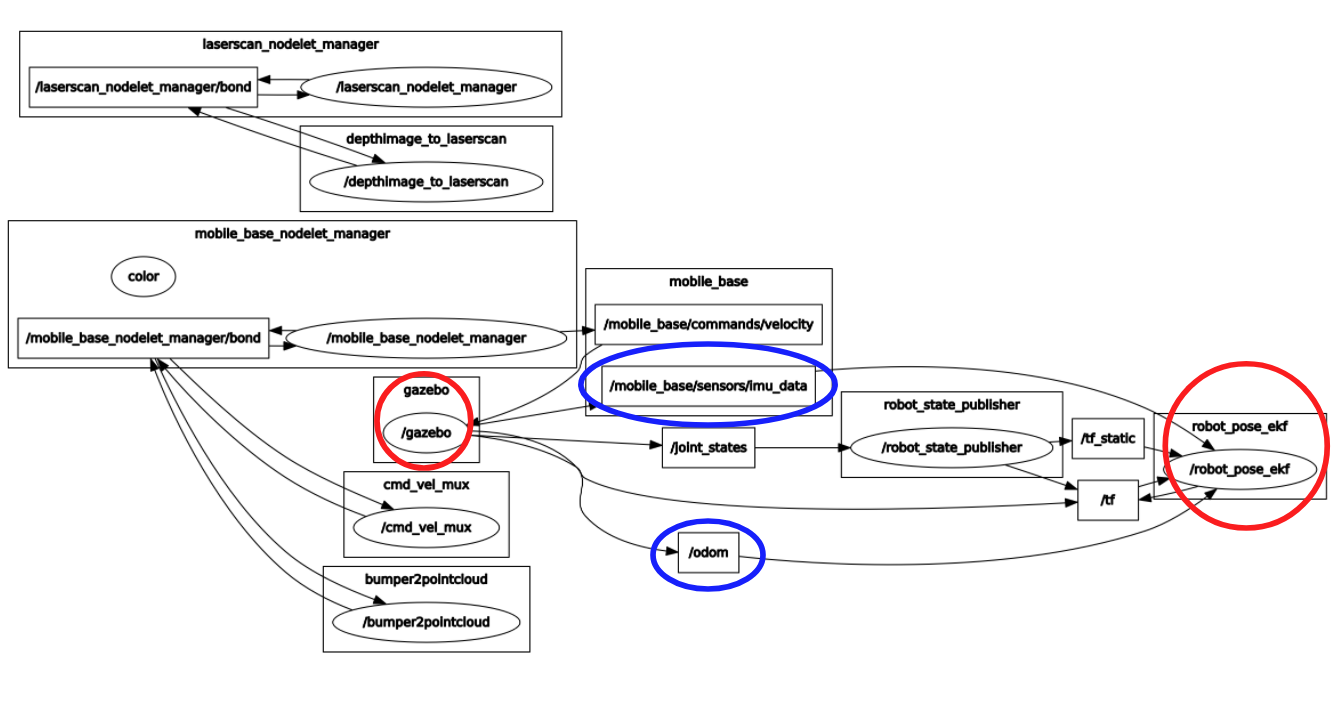
rqt graph
. In
rqt graph
, visualize how the topics and nodes are connected. In the
active nodes and topic
, you won’t be able to see the
3D filtered pose
topic since we haven’t yet subscribed to it.
Visualize the topics:
$ rosrun rqt_graph rqt_graph